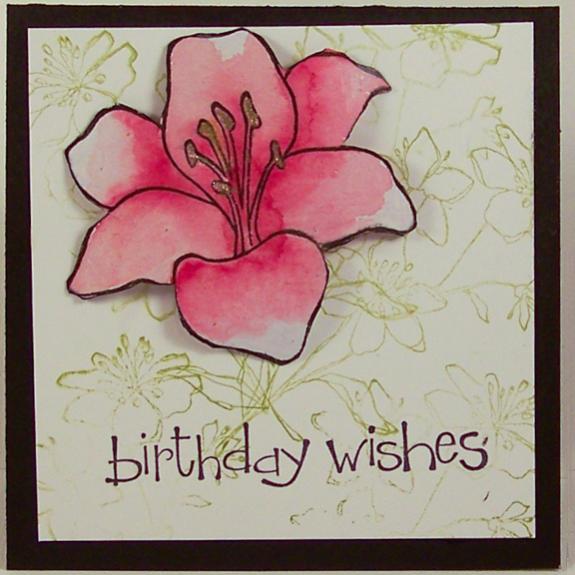
Question: Is it possible to water color with Stampin’Up! Markers?
I have been told that I need to purchase really expensive markers to do this. Is that correct?
Answer: No, absolutely not. You can achieve beautiful results using Stampin’ Up! markers. The only absolute must is to use water color paper. Here is a quick project to show you the beautiful result you can achieve with our markers.
SUPPLIES:
Stamp Sets: Fifth Avenue Floral (113734), Simply Sent (122567 – Hostess Set), So Happy For You (123220)
Card Stock: Basic Black (121045) 3″ x 6″, scored at 3″, Whisper White (100730) 2 3/4″ x 2 3/4″ (second one is for the inside.)
Ink Pads: Black Stazon (101406)
Markers: Real Red (100052), Basic Black (100082)
Other: Watercolor Paper (122959), Watercolor Pencils (101879), Blender Pens (102845), Aqua Painter (103954), Paper Snips (103579), Dimensionals
INSTRUCTIONS:
1. To begin, cut the card stock for the note card.
2. Stamp the floral image on Water Color Paper with Black Stazon (use this instead of a classic ink pad so it won’t run).
3. To achieve the watercolor look, work on one petal at a time. Use the Aqua Painter (fillled with clear tap water) to moisten one flower petal. Begin with the Real Red Marker at the center of the image. Use the Blender Pen to drag the color into the middle of the petal leaving the tip white. Repeat this step on the rest of the petals. Set the image aside to dry.
4. Stamp the leafy image on the Whisper White card stock for a background. Use the stamping off technique for a soft look. (Stamping off is achieved by inking the stamp and first stamping on a scratch paper and then immediately on your art piece.) Stamp the “Birthday Wishes” message at the bottom of the art piece using the Basic Black Ink pad.
5. Use the White Watercolor Pencil to add some brightness at the bottom of each petal. Cut the floral image out with your Paper Snips. Use the Basic Black Marker to go around all the cut edges to add back to replace any black that was cut off. Add 3 to 4 dimensionals to the back of the image and adhere to the front of the note card. Add the Whisper White card stock to the inside. You can leave it blank or add a message.
You are done! Stand back to admire your creation!


