Check This Out: new photo box punches in My Digital Studio! The new digital download template called Check This Out (129921) has something I’ve been waiting for: rounded edge photo box punches! You can use the designer layouts with the template pages, or use the punches wherever you want. Check This Out! (literally!).
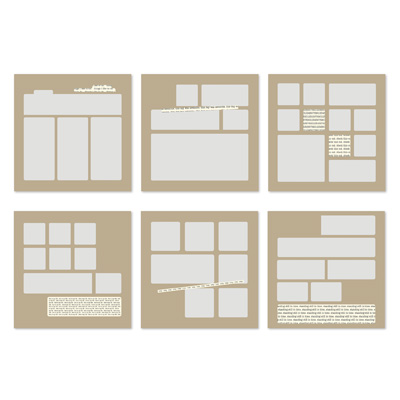
Here is a snapshot of the 6 template pages that come with the Check This Out! download:
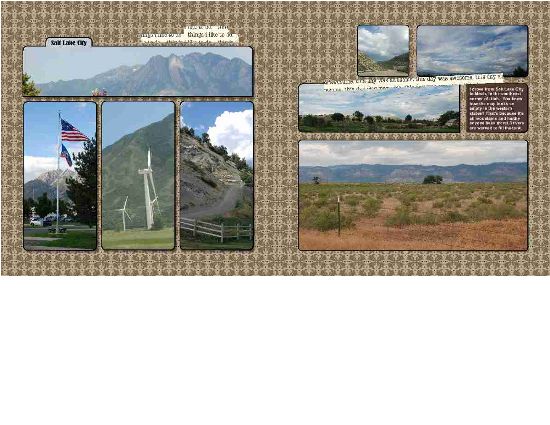
It also includes 7 embellishments and 17 photo box punches of various sizes and shapes, with cool rounded edges. But the greatest thing is that you can fill these cool punches with a picture! Check out the pages I made for my Utah trip album, and I will tell you how to do it below. Just a simple trick!
For the two pages above, I just used the first two page templates as is, changed the background to Mocha Morning DSP (129008) and dropped pictures into the photo box punches. Wait, you say! How do you do that? It’s easy!
There is an option to do a “Replace Image” on a punch… but in order for the button to appear, you need to have filled it with an image before you can replace it! Here’s what to do:
- Add a punch to the page, or select a punch on the template
- Fill it with a Designer Series Paper (any one – it doesn’t matter)
- Double click on the punch shape, bringing up the Punch Image Editor box
- Select the “Replace Image” button, bringing up the browse screen where you can select the name of the folder that has the picture you want to use
- Click on the picture, bringing up a preview on the right (hint: it helps to know which picture you want ahead of time!)
- The picture fills the punch shape in the Punch Image Editor box, and you can move the punch shape around to select the part of the picture that you want.
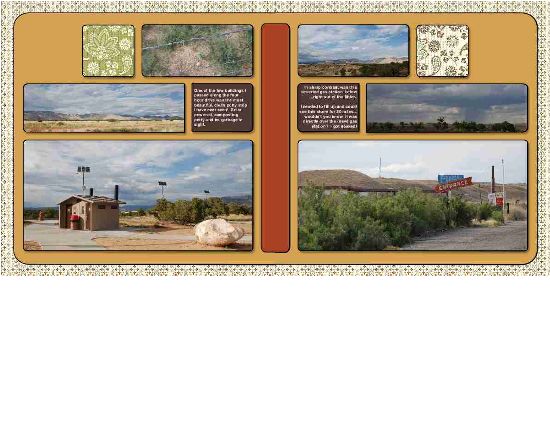
Cool, huh? For the next two pages in the album, I modified the template pages:
Here’s how I did it:
- I started on the left page, using the same template from the right hand page in the first set, and filled the background paper with a Spice Cake Designer Series Paper (125610).
- I added one of the rounded punch shapes from the Check This Out download, stretched it to cover most of the page and to extend off the right side of the page (so that the rounded corners wouldn’t show).
- I sent it to the back layer (using the Change Object Layer icon on the top) and filled it with More Mustard to match the scenery.
- I added the vertical shape in the middle of the pages, then stretched and positioned it off the page in the same way, and color filled it with Cajun Craze.
- I saved the project, then went down to the bottom of the screen and right clicked on the page. I chose “Insert Duplicate Page Mirrored”.
- This gave me the same page, in reverse, but the best part is that the two punches that extend across the center edges of the page line up correctly!
So I filled the background and punch shapes with pictures and Spice Cake DSP (125610), and added text boxes on top of some of the punch shapes. Ta da! I really like the simple graphic layout, as it reminds me of some of the cave paintings that I saw out in the mountains. But, more to come about that in a future post!
If you also love this template and the cool punch shapes, you can download it right now! Go to my online store, and if you do it this week you just have to select it from the current week’s digital downloads shown on the right. Or, simply search for Check This Out (129921)! Add it to your cart, download, and use it right away!
Tell me what you think of this cool tip using Check This Out: new photo box punches in My Digital Studio!


Thanks Carol! This is just what I was looking for and so glad to see your trip to Salt Lake City – the general area where I have lived my whole life! I wasn’t expecting that! Love it!
Oh, and thanks for the instructions…I’m so new to this it will come in handy!
Hi Cynthia,
Glad it is of interest! What fun to see pics of Utah if you weren’t expecting them!
And remember, these directions were from the original version of My Digital Studio. It is even easier to fill a punch with a picture in the new MDS2 – add a punch to the page, select it and the Punches section opens on the right in the Design Center. Then, simply click on “Photo Fill” and select the picture you want in the punch!
I love it when things get easier!
Carol