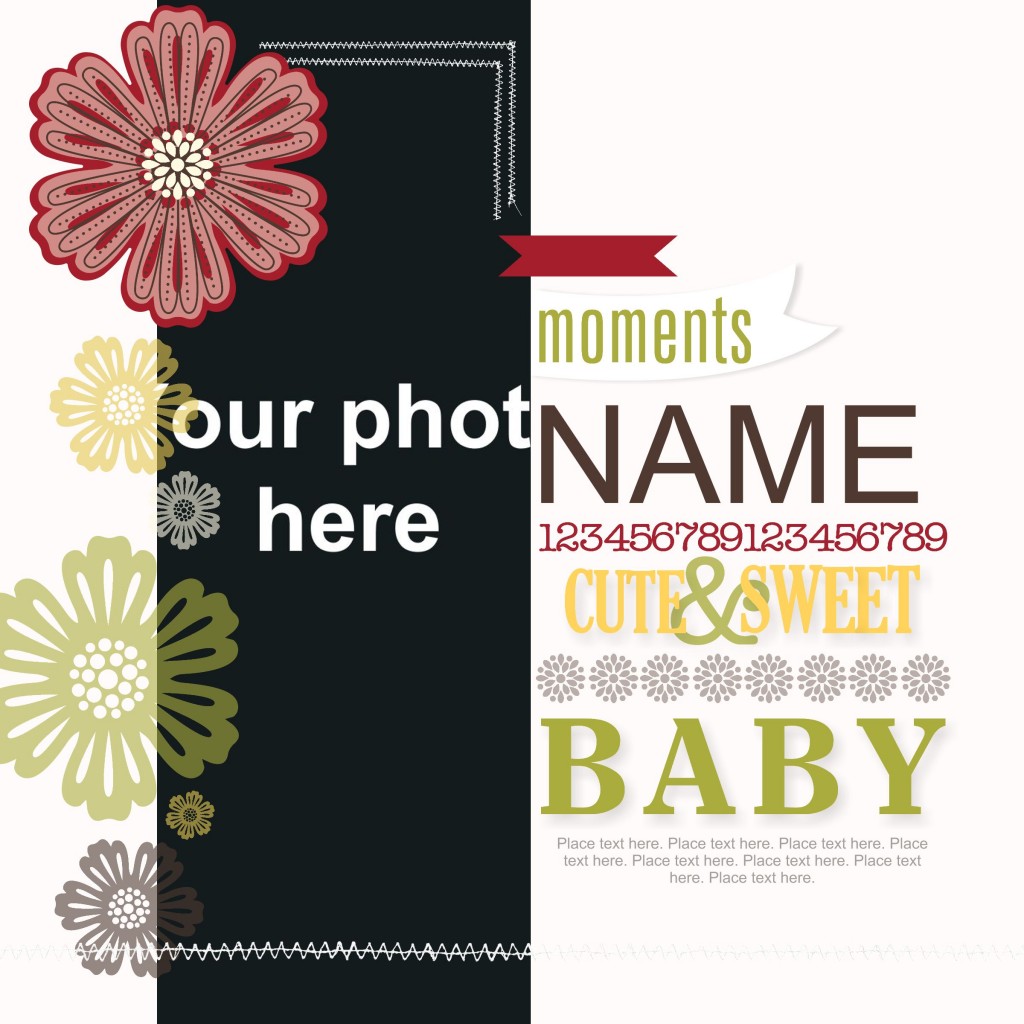
I’d like to show you How to Make a New Baby Gift by Modifying a Template in My Digital Studio! Wow, that’s a mouthful – but it is actually a really easy project. Check out the template I’m going to start with:
Here’s what got my creative juices flowing: I got an email from one of my customers yesterday, who said she had downloaded the free 30 day trial of My Digital Studio 2 and was enjoying exploring the software. She was wondering if there is a template to make a framable baby gift… so I took a tiptoe through the templates and found that, while there wasn’t one specifically listed as a “framable” in the online store, there was this cute 8×8 page that comes included with the Mixed Bunch Kit – Digital Download (129359).
I like it! The one I show above has a dummy picture in it so that it will display the picture area (it is black with the words “Your photo here” but since I made it quickly and didn’t bother to adjust the zoom, it looks like it says “our phot here” – isn’t that funny?). Anyway, all you have to do is drop in the picture, change the name in the text box to the baby’s name, add a few words to the text box at the bottom to personalise it, and it is ready to print and drop into an 8×8 frame (I recommend the professional printing).
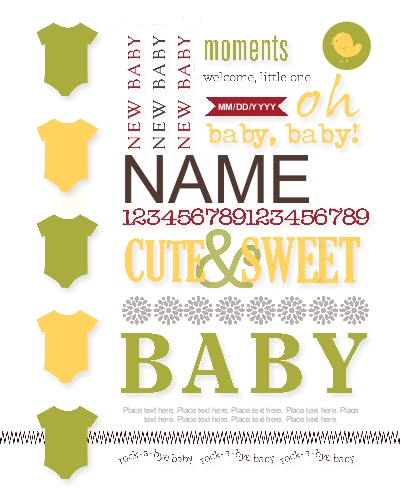
Then I started thinking – what if we wanted to make a gift like this but didn’t have a picture of the baby? and maybe we would like it to be a bit less flowery (um, maybe it’s a boy?!)… and heck, it’s a lot easier to find an 8×10 frame than an 8×8. So, I modified the template! How do you like this one?
Here’s what I did:
- I made a new project using the Mixed Bunch template, which gave me an 8×8 photobook with one page
- I clicked on Edit in the top navigation bar, and selected Change Project Size/Type. Then I specified the new size to be 8×10
- I deleted the picture and the flowers
- I had to move some of the pieces around a little, but I was planning to do that already! Most of the content on the page is made up of individual letter stamps that form the words, so I grouped them together to make it easier to move them (click on each item while holding down the CTRL key, then click Arrange on the top navigation bar and select Group)
- Then I relocated and enlarged the pieces to fill more of the page
- I added various other words, stamps & embellishments to fill the page, mostly from the Seriously Awesome (130664), Fundamental Phrases (118824), Little Additions (123135), and Rock-a-Bye stamp sets. Depending upon which version of the MDS software you are using, these may be either included with the software or available for purchase as a download through my online store.
To rearrange the items, there is a convenient and easy way to control spacing of items on the page: select a single item by clicking on it (or click and select multiple items while holding CTRL), then click Arrange and select Align; use the options on the drop down menu. Choices are:
- Top, Middle or Bottom – controls vertical spacing
- Left, Center or Right – controls horizontal spacing
- Center Vertically on Page
- Center Horizontally on Page
- Space Evenly – Horizontal or Vertical – these are fabulous to distribute items evenly across a space


Ah, that’s an interesting question – and something I face in both my blog and in my fiction writing (hint: I’m writing a mystery about a scrapbooking sleuth). I typically break it up into multiple sessions, and for the blog, I plan the topic ahead of time as well as some of the points that I want to cover. That way, I don’t sit down with that dreaded blank page staring me in the face!