Check This Out: new photo box punches in My Digital Studio!

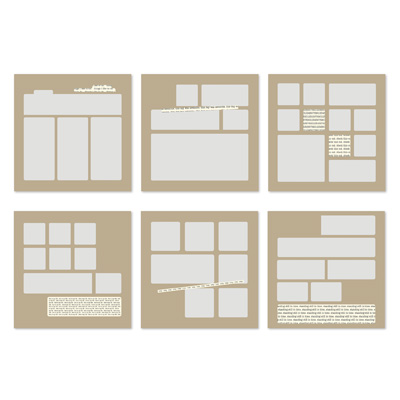
Check This Out: new photo box punches in My Digital Studio!  The new digital download template called Check This Out (129921) has something I’ve been waiting for: rounded edge photo box punches!  You can use the designer layouts with the template pages, or use the punches wherever you want.  Check This Out! (literally!).

Here is a snapshot of the 6 template pages that come with the Check This Out! download:

129921 Check This Out Designer Page Template

129921 Check This Out Designer Page Template

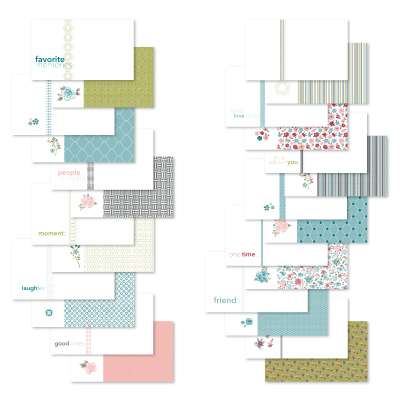
It also includes 7 embellishments and 17 photo box punches of various sizes and shapes, with cool rounded edges.  But the greatest thing is that you can fill these cool punches with a picture!  Check out the pages I made for my Utah trip album, and I will tell you how to do it below.  Just a simple trick!

Check This Out template - basic

Check This Out template - basic

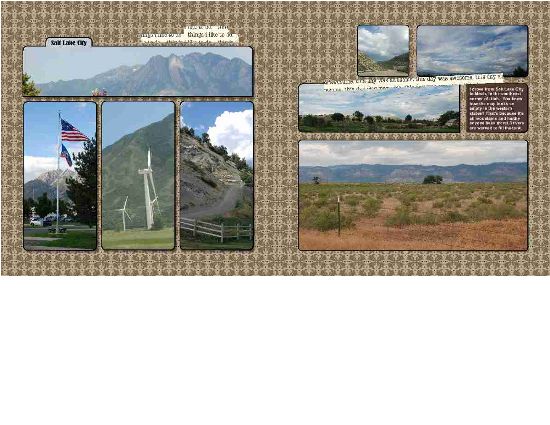
For the two pages above, I just used the first two page templates as is, changed the background to Mocha Morning DSP (129008) and dropped pictures into the photo box punches.  Wait, you say!  How do you do that?  It’s easy!

There is an option to do a “Replace Image” on a punch… but in order for the button to appear, you need to have filled it with an image before you can replace it!  Here’s what to do:

  1. Add a punch to the page, or select a punch on the template
  2. Fill it with a Designer Series Paper (any one – it doesn’t matter)
  3. Double click on the punch shape, bringing up the Punch Image Editor box
  4. Select the “Replace Image” button, bringing up the browse screen where you can select the name of the folder that has the picture you want to use
  5. Click on the picture, bringing up a preview on the right (hint: it helps to know which picture you want ahead of time!)
  6. The picture fills the punch shape in the Punch Image Editor box, and you can move the punch shape around to select the part of the picture that you want.

Cool, huh? For the next two pages in the album, I modified the template pages:

Check This Out template - custom

Check This Out template - custom

Here’s how I did it:

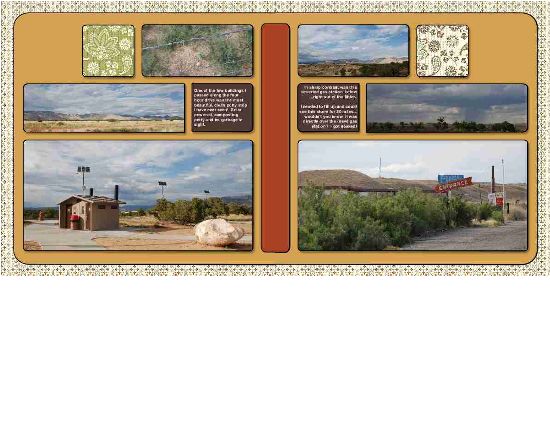
  • I started on the left page, using the same template from the right hand page in the first set, and filled the background paper with a Spice Cake Designer Series Paper (125610).
  • I added one of the rounded punch shapes from the Check This Out download, stretched it to cover most of the page and to extend off the right side of the page (so that the rounded corners wouldn’t show).
  • I sent it to the back layer (using the Change Object Layer icon on the top) and filled it with More Mustard to match the scenery.
  • I added the vertical shape in the middle of the pages, then stretched and positioned it off the page in the same way, and color filled it with Cajun Craze.
  • I saved the project, then went down to the bottom of the screen and right clicked on the page.  I chose “Insert Duplicate Page Mirrored”.
  • This gave me the same page, in reverse, but the best part is that the two punches that extend across the center edges of the page line up correctly!

So I filled the background and punch shapes with pictures and Spice Cake DSP (125610), and added text boxes on top of some of the punch shapes. Ta da!  I really like the simple graphic layout, as it reminds me of some of the cave paintings that I saw out in the mountains.  But, more to come about that in a future post!

If you also love this template and the cool punch shapes, you can download it right now!  Go to my online store, and if you do it this week you just have to select it from the current week’s digital downloads shown on the right.  Or, simply search for Check This Out (129921)!  Add it to your cart, download, and use it right away!

Tell me what you think of this cool tip using Check This Out: new photo box punches in My Digital Studio!

Digital Downloads for My Digital Studio – March 6, 2012

1) One of the coolest new things is now available in the digital downloads for My Digital Studio – March 6, 2012!  It’s the new rounded punch format in the Check This Out Designer Page Template.  If you have ever wanted to apply a rounded corner to a punch in My Digital Studio, you will know how delighted I am!  Look for my blog post tomorrow to see how I use it!  Check out below.

129921 Check This Out Designer Page Template

129921 Check This Out Designer Page Template

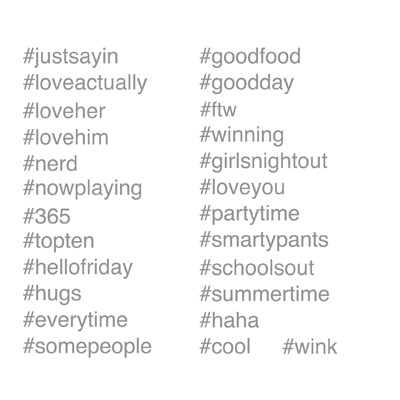
2) And take a look at the cool #Hashthis stamp set for adding social media tags to your cards or layouts:

129934 #Hashthis Stamp Brush Set

129934 #Hashthis Stamp Brush Set

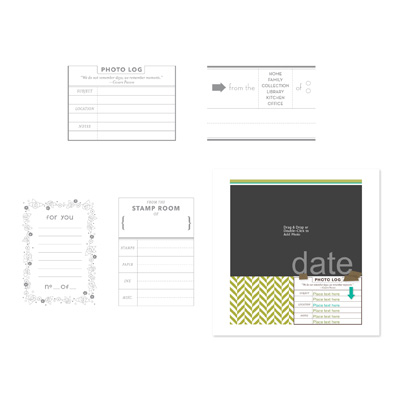
3) You might enjoy using this Open For Trade page template in a future scrapbook project, as you can label the pages with info about how the picture was taken.  Really cute – looks like tags from a professinal photographer shop! It comes with:
* 4-piece stamp brush set
* 1-page 5″ x 5″ designer template

129604 Open for Trade Stamp Brush Set

129604 Open for Trade Stamp Brush Set

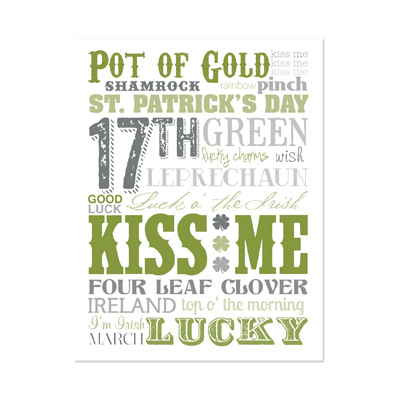
4) This next Lucky Framable Designer Template one is a lot of fun for St. Patty’s Day or anytime you are feeling the luck of the Irish – you can easily make a card, or a gift that you can frame for your favorite Irishman… or Irishwoman!

129930 Lucky Framable Designer Template

129930 Lucky Framable Designer Template

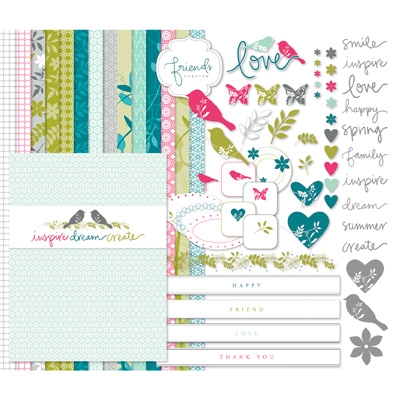
5) How beautiful is this?!  You can use these gorgeous papers and words for scrapbook or cards, as well as the journal template.  The Walk in the Park Kit II download includes:
* 12-piece stamp brush set
* 14 Designer Series Papers
* 40 embellishments
* 6-1/4″ x 8-1/4″ journal front and back cover designer template

And it features:
* New exclusive-to-digital color palette
* Stamp brush set designed for multiple colors per image
* Imagery suits birthdays, spring or summer projects, or everyday designs
* Journal designer template great for teacher gifts, thoughtful moments & more

Coordinating colors:
Basic Black, Basic Gray, Island Indigo, Lucky Limeade, Melon Mambo, Pool Party

129607 Walk in the Park II Kit

129607 Walk in the Park II Kit

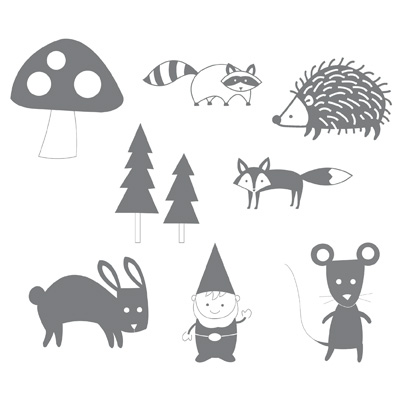
6) And last but not least for this week, a darling stamp brush set.  Who can resist woodland creatures and gnomes?  Cute for cards, scrapbook layouts, or to create a mat for printing a picture to be framed.

130681 Life In The Forest Stamp Brush Set

130681 Life In The Forest Stamp Brush Set

If you are interested in any of these delightful downloads, go to my online store.  On the right, you will see the green circle where you can select the My Digital Studio Express free trial, and the downloads from the current week are shown below it.  Pick any of these from March 6… or just click on Digital Designing on the left for more options!

How to save money as you crop and enlarge your pictures with My Digital Studio

Here’s how to save money as you crop and enlarge your pictures with My Digital Studio!  Doesn’t that sound great?

Have you ever taken a picture into the photo store to be enlarged for a scrapbook layout?  It can cost $5 or $10 just for a 5 x 7″enlargement – and that is if you are simply enlarging the whole picture.  You may need to pay extra to get them to zoom in on a particular part of the picture, cropping out the rest!

I love using My Digital Studio for my digital scrapbooking, and one of the biggest reasons is that I can crop and enlarge pictures on the fly!  No waiting, and no big expense!  Let me show you two examples:

1) Giant size pictures (LOL)

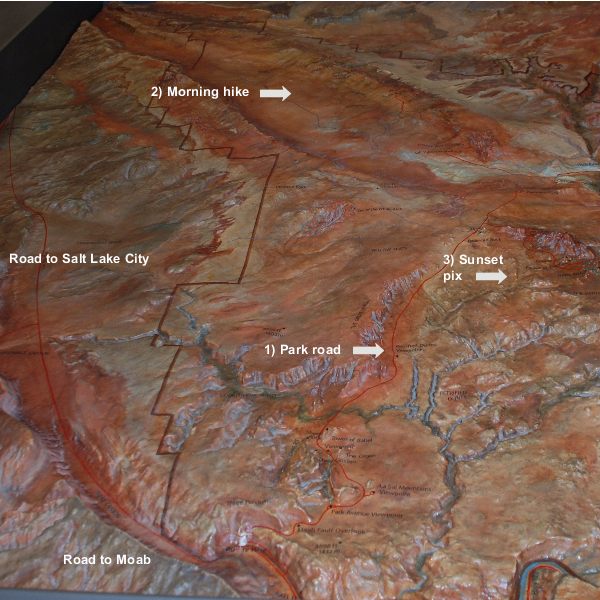
Here are two pages that I made about my trip to Utah this past summer, where I went hiking in Arches National Park.  In the Visitors Center, I took a picture  of this cool 3D topographical map, and then blew it up to giant size so I could add labels for the different areas that I hiked and visited!  I made it so big that I had to split it between two pages, so here is the left page and then the right page:

My Digital Studio photo enlargement layout - left page

My Digital Studio photo enlargement layout - left page


My Digital Studio photo enlargement layout - right page

My Digital Studio photo enlargement layout - right page

Isn’t that cool?  Just imagine how much it would have cost to make TWO 12 x 12″ enlargements of the same picture for this layout!  And, I was able to add captions right on top of the picture to match my journaling on the right.

2) Zooming in on a picture

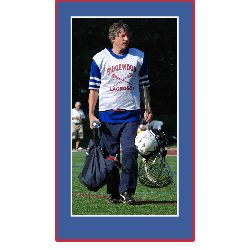
My hubby coaches 8th grade boys lacrosse, and he played in the “Old Goat” game with a bunch of the other alumni and coaches.  Well, I got a great picture of him after the game, but you probably know how big those playing fields are… even with my good Nikon camera and a good zoom lens, I can’t zoom in on just one person from across the field!  Take a look at the difference it makes when I zoom in and crop the picture using My Digital Studio.
Basic photo:
Hubby's full picture

Hubby's full picture

And here is what the picture looks like when I zoomed in on him, cropping out the distracting stuff on the sides:

Cropped photo with triple mat

Cropped photo with triple mat

POW! my eye focuses on him (and he is indeed a handsome fellow, yes?).  I quickly added a white mat around the picture, then inserted a square punch behind it, stretched it to the right size, colored it Pacific Point blue and matted a red mat on the punched shape for a triple mat.  All in about 60 seconds!  And note – if there was not already a Stampin’ Up! color that matched his uniform, I also could have made the punched mat exactly match a color in the picture!

Can you think of some scrapbook pages you have done where this would have been useful?  I bet you’re happy that you see how to save money as you crop and enlarge your pictures with My Digital Studio!
My Digital Studio during Sale-A-Bration

This is absolutely the best time to purchase the intuitive software  My Digital Studio during Sale-A-BrationMy Digital StudioLet me show you how to maximize your savings.  As you may already know, for every $50 you spend on Stampin’ Up! products you get an additional item from the SAB catalog for free!  Sale-A-Bration runs through March 31, 2012.

So let’s see how that can work for you.  If you purchase My Digital Studio for $79.95, you will get one free item!  There are great stamp sets, paper, and fabric selections… Or, if you want to stick with digital design you can choose from two different sets of digital content on a CD for My Digital Studio:

Digital Option #1: One Big Sale-A-Bration CD (127220)

Select item 127220 as your free SAB product and you will receive a CD with ALL of the new, exclusive SAB content in digital format!  You get:

  • 5 stamp brush sets
  • 12 Designer Series Paper Patterns
  • 6 ribbons
  • 5 brads

Digital Option #2: Piece of Cake Ensemble CD (127222)

This is a CD with an entire digital kit for hosting a party, including invitation, greeting card, tag and various decor elements.  You get:

  • 72 embellishments
  • 1 punch
  • 37-piece stamp brush set

    MDS SAB Piece of Cake Ensemble CD

    MDS SAB Piece of Cake Ensemble CD

You can get either of these digital CDs free when you purchase My Digital Studio before March 31, 2012.

Ah, now I can hear you thinking… if I get ONE free SAB product for every $50 I spend… and My Digital Studio costs $79.99… simple math tells me that I can spend only an additional $20.01 and get BOTH digital CDs for free!

Let’s look at how you can do that.  You can of course purchase ANYTHING in the Stampin’ Up! product line of rubber stamps, papers, ink pads, die cuts, embossing folders, embellishments, albums, and so on… but let’s assume you are on a roll here with the digital design mode.  What are some options?

From the Occasions Mini Catalog, you can order the:

  • 125615  Twitterpated Swatchbook Designer Template for $12.95.  You get the template for a 26-page swatchbook where you simply drop in your photos… and then you can print multiple books!

    125615L Twitterpated Swatchbook Designer Template

    125615L Twitterpated Swatchbook Designer Template

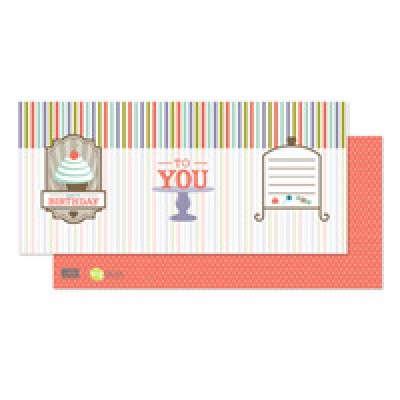
  •  125617 Sweet Shop Trifold Card Designer Template for $1.95.  You get the layout for a colorful trifold double-sided birthday card, ready to create multiple cards in a flash! and you can customize the colors and elements.  It coordinates with other Sweet Shop series products.

    125617S Sweet Shop trifold card template

    125617S Sweet Shop trifold card template

  • 125590 Scented Stampin’ Emboss Powder is not a digital product, but something fun you can use with the trifold card to make a delightful hybrid card… make the cupcake frosting on the card smell like vanilla!  $5.95.

So there you have it: My Digital Software for $79.95, plus $20.85 for the above items, gives you a total of  $100.80 and you get BOTH free SAB digital CDs!

And if you either purchase My Digital Studio from my online store, or try the free 30 day trial of My Digital Studio Express, you can sign up for my free 30 day support classes showing you how to get started!  Click here for more details.

To purchase My Digital Studio, visit my store here or click on “Shop Now” on the top right.  Woo hoo – let the digital designing begin with My Digital Studio during Sale-a-Bration!


My Digital Studio free 30 day trial

You have probably noticed, from past posts, how much I like My Digital Studio, and I am so excited about the My Digital Studio free 30 day trial!

It’s very simple to get the software.  MDS Express TrialSimply click here (or on the Shop Now button on the top right) and you will be taken to my online store, where you can order the software FOR FREE!

Then simply download the My Digital Express software.  The Express version is not terribly large, and you can easily download it even with a regular Internet connection (no high-speed connection needed!).   Your 30 day trial does not start until you launch the My Digital Studio software for the first time… so you can order and download it now and wait until you have a little time to look at it (like maybe this weekend? LOL!).

You may be wondering what you get with this free download… some people don’t believe things are any good if they are free, but I am happy to tell you that you get the exact same version of the My Digital Studio Express software that you can buy for $39.95.  It is intuitive, easy to use and the results are delightful!

When the 30 day trial period is over, you get a reminder that you can buy the software and continue to use it… either the Express version that you already have with the free trial, or the full My Digital Studio software with almost 500 different components such as templates, stamps, Designer Series Papers, punches, embellishments and more!

Still want more info?

  • Aha, I hear you asking: what is the difference between the full My Digital Studio and the My Digital Studio Express?  Click here and I will fill you in!]
  • Click here for Frequently Asked Questions about the free trial
  • Contact me at carol@carolGpapercrafts.com if you have more questions!

You may also be wondering how to get going with the software!  If you order it through me, I will be happy to offer you free orientation and tips over the 30 day trial.  After I get notification from Stampin’ Up! that you have ordered the free trial, I will send you an email where you can sign up for my free orientation program!  More info coming soon!

So what are you waiting for?  Click here to get started with your My Digital Studio free 30 day trial!


My Digital Studio 30 day free trial offer

I am so excited to let you know about the My Digital Studio 30 day free trial offer!

You can download it immediately by adding item 129600 to an online order.  Click on “Shop Now” on the top right or click here for more information about the My Digital Studio 30 day free trial offer!

Journal right on your pictures

In this week’s post to the Sunday Journal, Sunday JournalI have an example of how to journal right on your pictures.  I find that sometimes, when I have a number of comments about individual pictures, it is easier to simply add the journaling to some blank space in the picture itself.

This prevents me from having to specify the picture to which I am referring, when I put the journaling over to one side of the page… it is quite clear that I am talking about the picture that has the words on it!

The scrapbook pages below are from my trip to Utah this past summer, when I attended the Stampin’ Up! convention.  I was really struck by the way the city was nestled in a valley and there were mountains all around!  Rather than waste space on an additional title, I opted to put the title of “Salt Lake City” directly on the sky of the photo.

Utah journaling on pictures

Utah journaling on pictures

And you will note that the journaling for each individual picture is placed right on the picture.  This was easy to do in My Digital Studio by simple adding a text box on top of the picture and moving the text around so that it was in empty spaces.

There is one other neat fature of My Digital Studio that I was able to use in these two pages.  The individual photos were taken at different places and from different distances, so the mountains were not actually aligned.  However since I was talking about the city being ringed by mountains, I cropped and enlarged the adjacent photos so that the mountians looked like they lined up!

I hope that you have enjoyed this example showing how to journal right on your pictures!

NJ Crop Weekends highlight video

Check out the new NJ Crop Weekends highlight video! Are you thinking about coming to the Winter Crop Weekend on Feb. 24-26?  Click here to take a look and see some of what we did at the last one!

Everyone gets a big chunk of table space to set up their stuff.  We have classes, a marketplace, great food, and fun people.  Check out www.njcropweekends.com for details!

And here’s a preview – I am going to be offering a My Digital Studio class at the crop for the first time!  Stay tuned for more info, coming soon.

So, I hope that you’ll want to join us at the crop after viewing the NJ Crop Weekends highlight video!

NJ Crop Weekend Winter Crop is Feb 24-26, 2012!

OK, in yesterday’s post I mentioned that there are still two spots for the upcoming crop, but I forgot to say that the NJ Crop Weekend Winter Crop is Feb 24-26, 2012!

NJ Crop Weekends

NJ Crop Weekends

It starts on Friday morning at 10am, and runs through Sunday at 5pm.  You can attend for a single day, or stay over one or two nights with us at the beautiful Dolce in Basking Ridge, where the crop is held.

See www.njcropweekends.com for details!

NJ Crop Weekends Winter Crop spaces available

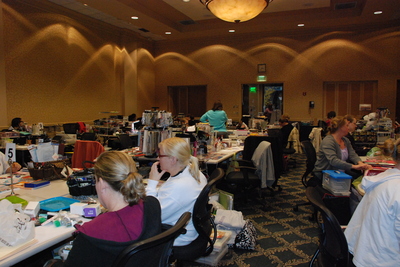
I am excited to say that there are still two NJ Crop Weekends Winter Crop spaces available!  Come and join us at the beautiful Dolce in Basking Ridge, NJ for a day or long weekend of paper crafting!  Bring your supplies and set up your own dedicated table space, shop our marketplace, enjoy great food at the restaurant and wonderful free snacks and beverages all day… and get a lot of crafting done!

Crop room at the Fall 2011 NJ Crop Weekend

Crop room at the Fall 2011 NJ Crop Weekend

Click here to check out our highlights video from the last weekend to see what it’s like!

Contact me for the registration packet with details and registration information.  And see the www.njcropweekends.com website with information on swaps we are holding at the Winter Crop Weekend, how to sign up for your hotel room, and more!