Hey, yesterday I posted pictures of the cool little gifts I made for the marching band banquet, and I promised to share the My Digital Studio treat box directions! So here we go.
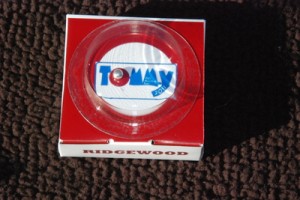
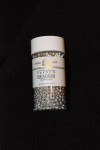
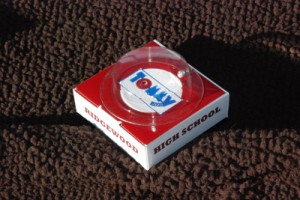
The music for this year’s show was Tommy by The Who. So, as I posted yesterday, I used the Stampin’ Up! Sweet Treat Cups and added one of those little silver cake decorating balls as a pinball. You can roll the ball around and try to get it into the hole that I punched in the letter “O” of the word “Tommy.”
Now, it is fun to make little gifts or favors like this, and it only takes a couple minutes to assemble one… but when you make 100 of anything, those minutes can add up and it can take a while! So, I used some of my favorite paper crafting tools to make it go faster… and to make the results look really professional! Read on!
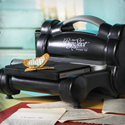
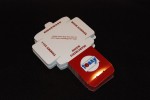
While you can of course just cut out the shape for a box from some cardstock, score the sides and fold into a box, using the Big Shot and the Bitty Box die make quick work of it. Feed the paper and die in, roll the handle, and the die cuts the shape AND scores the fold lines in one easy step! Then it is easy to fold along the score lines and assemble the box.
Making the placement template
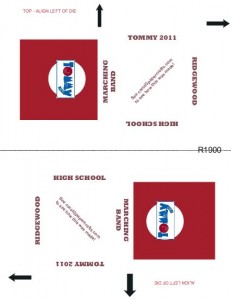
First, I took the plain box that I had assembled from scrap paper and made a sample – I sketched out the placement of the words on it as a guide. Then, I had to figure out how to make the words line up on the correct spot on the paper in My Digital Studio so that I could print them out and run them through the Big Shot.
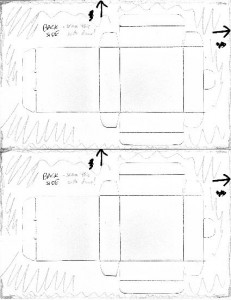
I took a piece of 8.5 x 11” paper and cut it in half horizontally to be 8.5 x 4.25”. Rotating it one turn so that it matched the way the die goes into the Big Shot, I drew an arrow on the left and top side to indicate where it should line up on the die. I carefully aligned it along the top and left side of the die and ran it through the Big Shot.
Taking the cut piece and sort of reassembling it back inside the half sheet of paper from which it was cut, I placed it on my printer scanner and scanned a copy.
I opened My Digital Studio and started an 8 ½ x 11” scrapbook page (click “Photobook & Individual Page” then “8 ½ x 11 Portrait” and then “Create Your Own”).
I added the scanned image onto the page as a picture, carefully sized it to be 8.5” wide, and placed it to exactly fill the top half of the page with the arrows aligned with the edge of the paper. Then I copied it, rotated it 180 degrees and pasted it on the bottom half of the page so that the arrows on the bottom one also aligned with the bottom edge of the paper. I felt it was important to position them this way so that it would not cause an alignment problem if I cut the paper in half slightly crooked!
> borderless printing is ideal if your printer supports it
> if it does not, make the border as small as possible and when you print, be sure to go into “Advanced” and select “Crop image to fill area” so that it will put it back to the correct size to fill the page.
Adding text and artwork
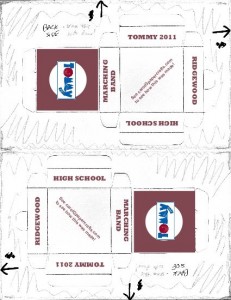
Once the template pictures were sized and positioned correctly, I copied the template to a new page as a precaution (sometimes a little paranoia is a good thing!). I flattened out the sample box on which I had sketched my design, and using it as a guide to which way to orient the content, I added artwork and text boxes onto the MDS page to line up within the sides of the box. I left a little space from the edges just for safety!
After printing a test run, I decided to increase the size of the punched image that will fill the top with color so that it extends over the edges of the die cut and no white will show at the edge of the cut. And I changed the color of the box top to Cherry Cobbler.
Printing and assembling
I printed them on glossy white paper, cut them in half, and ran them through the Big Shot. (Hint: when you’re doing a large number of these, it’s not a bad idea to set up in front of the TV!). I wound up with a stack of perfectly printed, cut, and scored box shapes!
Next I folded each scored edge, and then punched a hole in the top with the 1/8” hole punch. Placing a silver bead in the hole, I adhered the treat cup on top and burnished the edge with a bone folder to smooth out the adhesive so that it was mostly invisible.
Note: to make a more finished presentation, you could also cut an additional piece of cardstock or Designer Series Paper to cover the top of the box, punch a hole using the 1 ¾” circle punch, place it over the treat cup and adhere it to the top of the box using mini glue dots… but I opted not to do that due to the large quantity to be made!
Assemble the box and fill! I used fun size candy packets and didn’t bother adhering the box together. If you want to use loose candy such as a scoop of M&Ms, I recommend that you adhere the box together – place a piece of Sticky Strip or a glue dot inside each of the two side flaps and press them together after you have folded them over the little tabs.
Aren’t they cute? I will certainly be saving the template to use again… and that finishes the My Digital Studio treat box complete directions!

Carol,
These boxes are great! How ingenious. But I am not surprised. I was searching for a project and came across your blog. I love your site, very informative. I wanted to keeping reading . Miss talking to all of you.
Great Job!
Donna Rutkowski
Hi Donna, I was so pleased that this plan for decorating the boxes using My Digital Studio worked out – I couldn’t imagine hand stamping 100 of them! Thanks for looking! Carol